Starting a New Report
zPatrol allows users to create two types of reports: Incident Reports and Other (Supplemental) Reports.
Any report submitted using an Incident Report template counts as a primary incident in the zPatrol system and increases the incident count on the analytics dashboard once submitted or manually resolved.
Reports submitted using an Other report template are considered supplemental and do not affect analytics. These may include related forms such as witness statements or courtesy rides. Supplemental reports can be linked to primary incident reports for easier tracking and consolidated report downloads. Reports can be started in several ways:
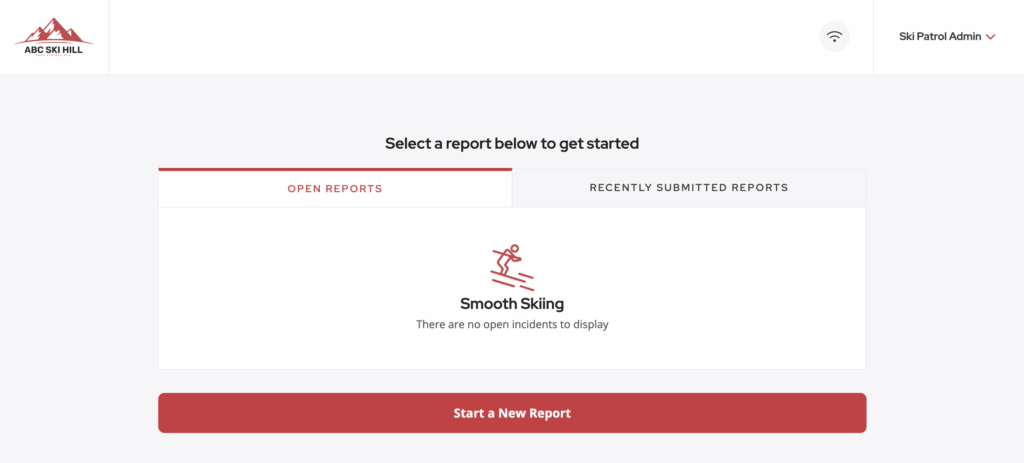
From the Patroller View landing page, patrollers can click Open on a previously dispatched incident or select the red Start a New Report button.
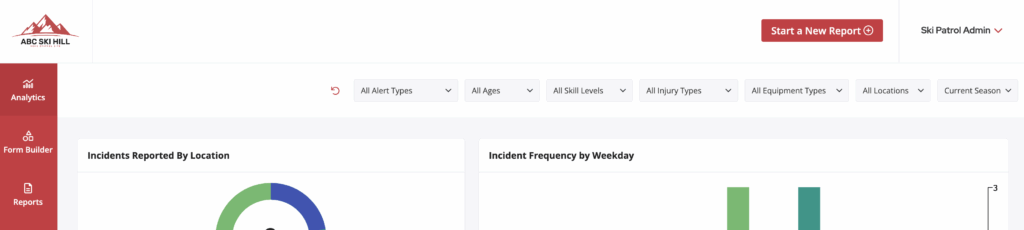
Administrators can also click the Start a New Report button at the top of the Admin Dashboard to access the report entry landing page and follow the same steps a patroller would to initiate a new report.
Once a new report has been opened or created, the user will be prompted to select which form template to use. By default, users land on the Incident Reports tab, which displays all available incident report templates. If a supplemental report is needed instead, the user can click the Other tab at the top of the screen to choose from the available supplemental report templates.
Saving and Exiting an Incomplete Report
The zPatrol system requires that all form fields marked as Required by a Company Admin be completed before submission.
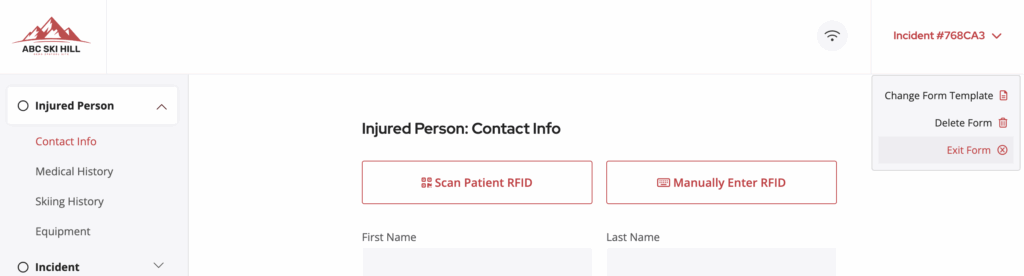
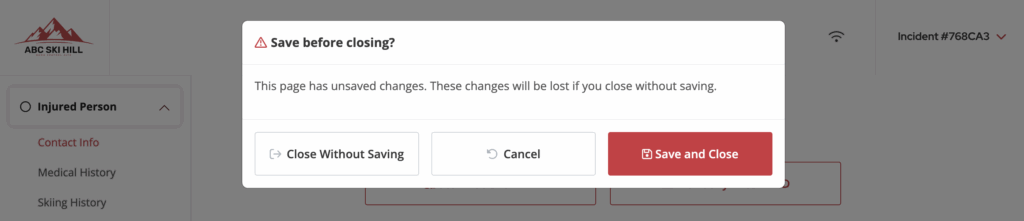
If a patroller is unable to submit an incident form due to incomplete data collection (for example, if a guest is transported to a higher level of care before information can be gathered), or if the patroller needs to pause and return to the form later, they can do so by clicking the Incident Number dropdown in the upper right corner of the screen and selecting ‘Exit Form’ which will prompt the user to Save before exiting.
To save your progress, choose Save and Close.
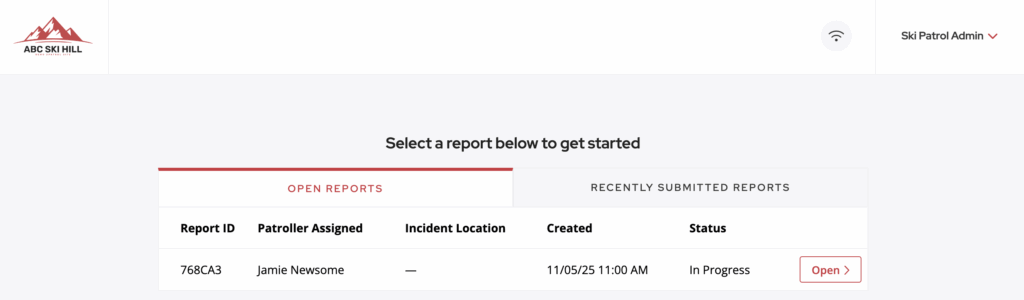
This action saves the report and keeps it accessible from the Patroller Landing Page, where it will remain in an In Progress state until the form is completed and submitted.
Reporting in Offline-Mode
The zPatrol system supports offline functionality so data is never lost if a Wi-Fi connection drops or isn’t available during incident reporting. Offline mode is available only on the Patroller Landing Page and during form entry. The admin analytics and reporting dashboard requires an active internet connection.
If a device goes offline, a clear “This device is offline” message appears at the top of the screen.
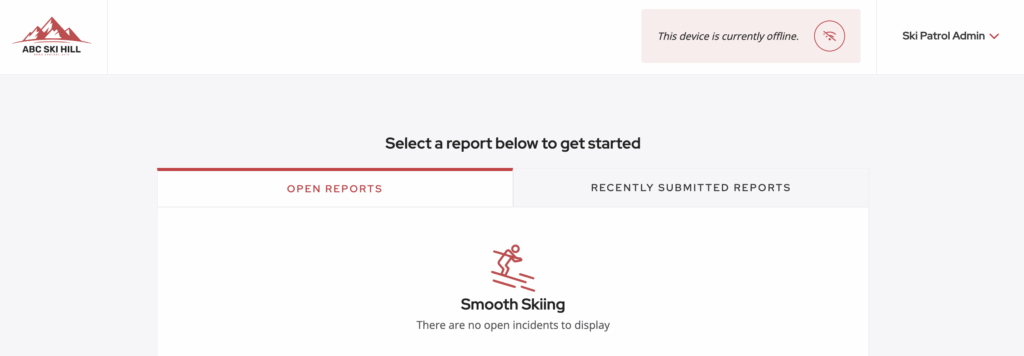
Patrollers can still save, exit, or submit reports while offline. When submitting, a message confirms that the report is being queued and will automatically send once the device reconnects to Wi-Fi. Because syncing between devices requires a live connection, incidents entered offline will not appear on other devices until the connection is restored.
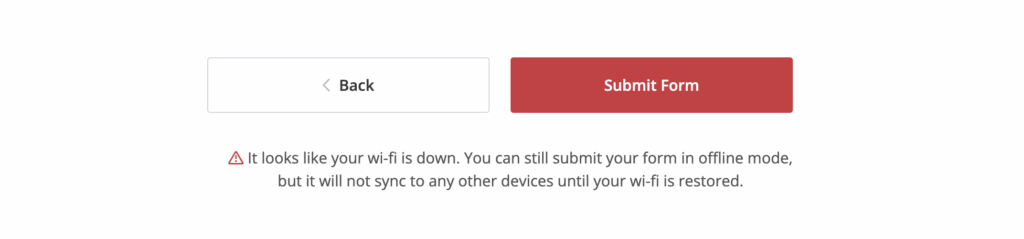
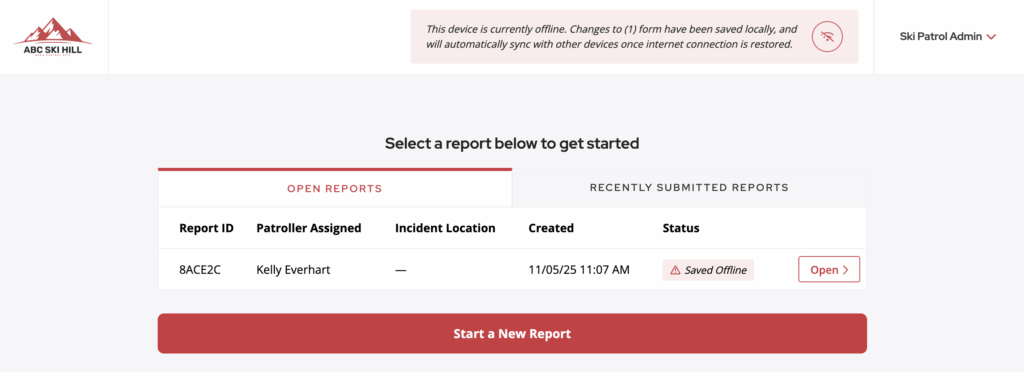
Any incidents saved or submitted offline will display a notice in the Open Incidents tab showing which reports are waiting to sync and how many unsynced incidents or reports remain.
Manually Resolving an Incomplete Form
If a patroller is unable to submit an incident form because of incomplete data collection (for example, if a guest is transported to a higher level of care before information can be gathered), the patroller can select Save and Exit. This action leaves the form in an In Progress state.
Patrollers cannot resolve or submit a form without all required data, which prevents incomplete submissions. However, a dispatcher or admin has the ability to complete this action.
To manually resolve an In Progress incident or form, navigate to Admin Dashboard > Dispatch. Click the Actions dropdown on the open form you want to resolve, then select Edit Incident.

In the form status dropdown at the top of the modal, change the status from In Progress to Manually Resolved.
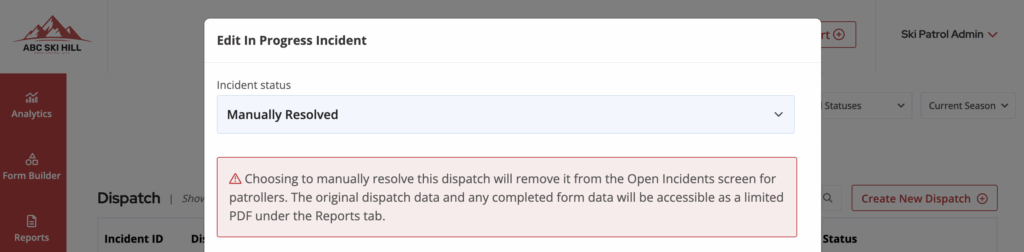
This moves the form out of the open dispatch view for both dispatchers and patrollers, and it becomes available as a report PDF on the Reports screen.

Modifying Submitted Form Data
Once a form has been submitted, a patroller no longer has access to edit or modify any form fields. However, users with Reporting or Admin access can make changes if needed.
To modify a submitted form, navigate to Admin Dashboard > Reports. Locate the report you wish to edit, click the Actions dropdown for that report, and select Edit Form Data.
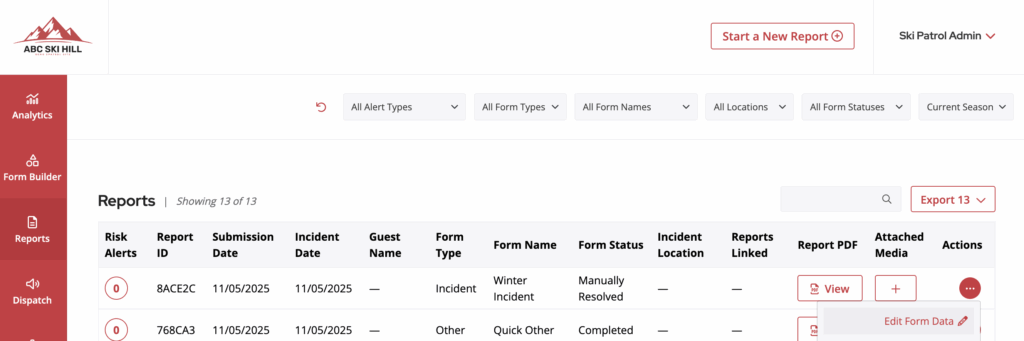
This will open the form in edit mode, allowing authorized users to make updates and save changes.
Patroller View of Recently Submitted Reports
Company Admins can choose whether patrollers have access to view the last 24 hours of submitted report data. When enabled, a “Recently Submitted Reports” tab will appear on the patroller landing page that allows patrollers to view and print recent reports.

To enable this feature, navigate to Admin Dashboard > Admin > Company Profile and locate the panel titled Patroller Report View. From this panel, use the toggle to enable or disable patroller report access.
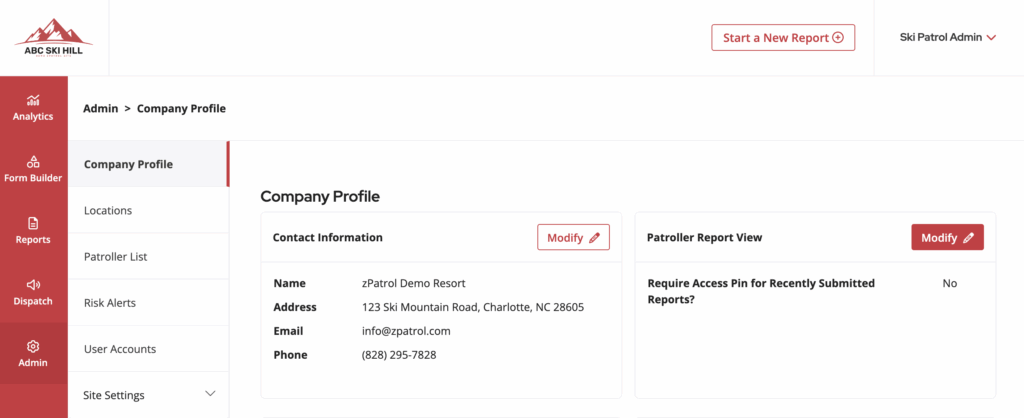
When enabled, patrollers will see an additional tab on their Patroller Landing Page where they can view or print recently submitted reports.
You also have the option to require a four-digit PIN for access to this tab. The PIN requirement and the PIN itself can both be set or changed from the same Patroller Report View panel.
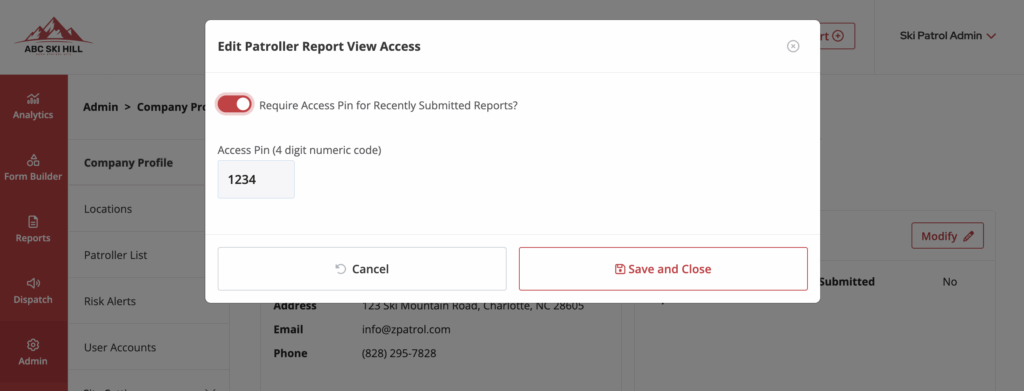
Uploading Photos to a Report
zPatrol supports the ability for patrollers to use their devices to capture images during the time of form data entry. An administrator must first enable this option by adding an Photo field to one of the patroller’s forms in the Form Builder
- Navigate to Admin Dashboard > Form Builder.
- Locate the form you want to update.
- Add a new form field and select “Photo” from the field types.
- Save Changes

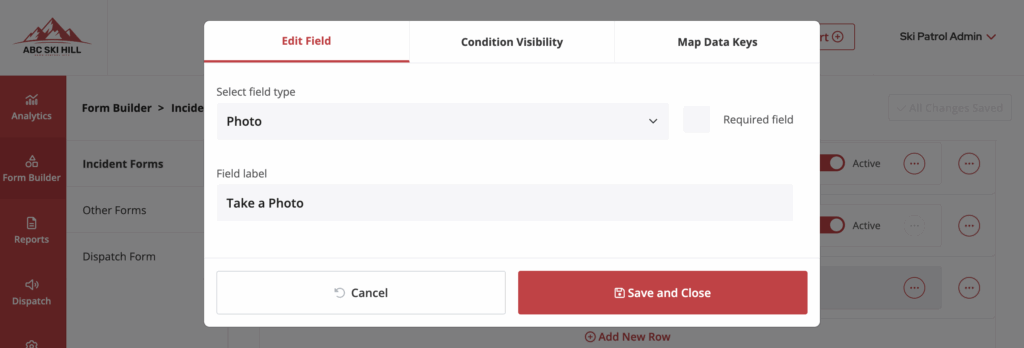
Once a photo field has been added to a form, patrollers will see a large button prompting them to take a photo using their device camera.
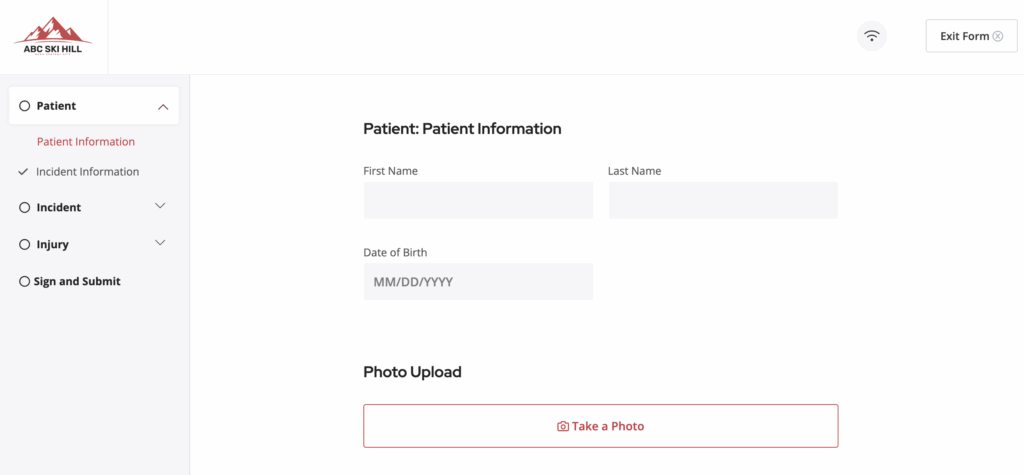
Once submitted, the photo automatically appears as a media attachment in the Media column on the Admin Reports dashboard.
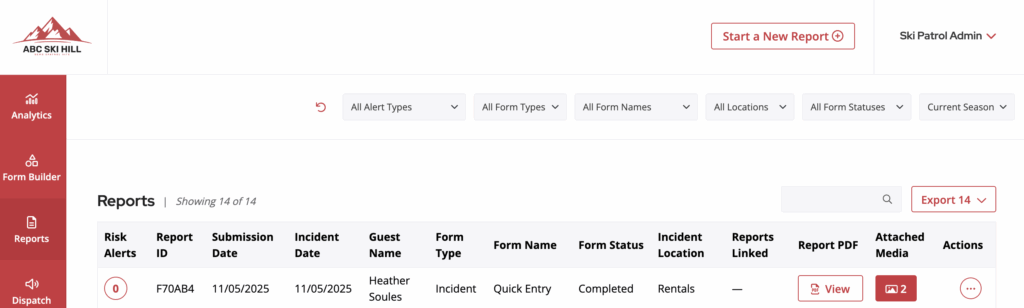
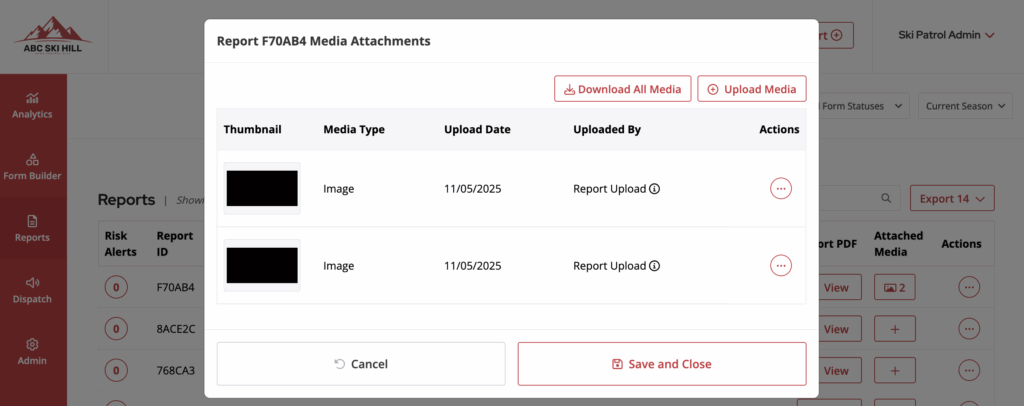
Note: Images uploaded from within a form can only be edited or deleted from within that same form. To do so, go to Admin Dashboard > Reports, click the Actions icon next to the report, and select Edit Form Data. From there, you can modify or remove the image.
Linking Other/Supplemental Reports to Incident Reports
If a supplemental (Other) report is related to an original Incident report (for example, a witness statement), you can link them together to create a complete incident investigation package. Only supplemental reports can be linked to incidents—you cannot link one incident report to another. Linking reports allows administrators to export a full incident package that includes all related reports and any attached media.
To link reports during form entry:
An administrator must first enable this option by adding a Report Link field to the supplemental form in the Form Builder.
- Navigate to Admin Dashboard > Form Builder.
- Locate the Other/supplemental form you want to update.
- Add a new field and select “Incident Report Link” from the field type selections

When patrollers open this form during entry, they will see a large button prompting them to search for a submitted incident report to link to. (Only submitted reports will appear; reports still In Progress cannot be linked.)
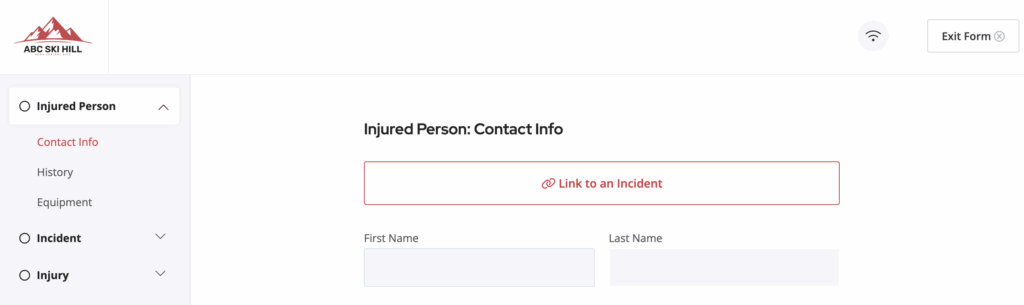
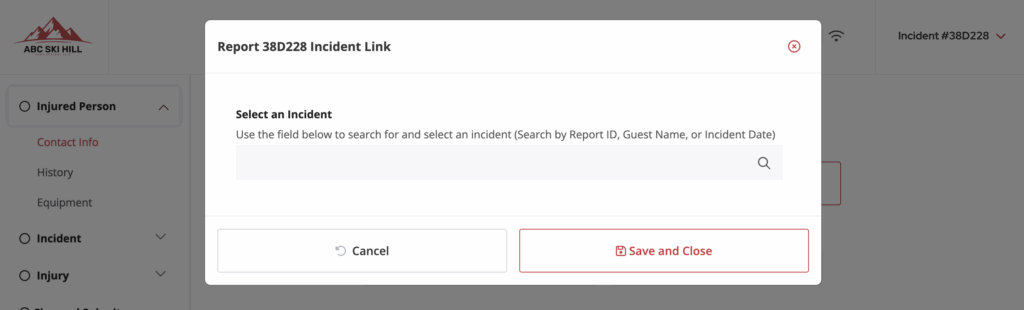
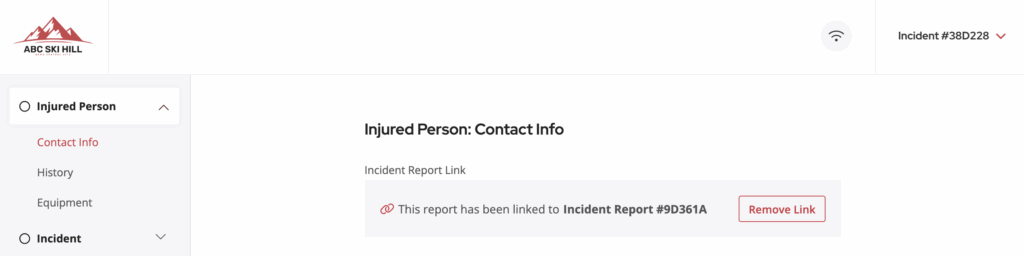
Once submitted, the link automatically appears on the Admin Reports dashboard.
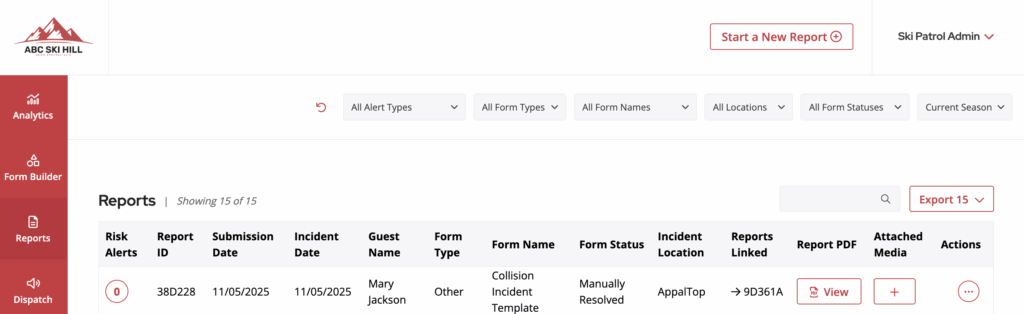
To link reports from the Admin Reports dashboard:
If a patroller was unable to link a report during form entry, administrators also have the option to add an incident link from the reports tab of their admin dashboard once a report has been submitted.
- Navigate to Admin Dashboard > Reports.
- Locate the supplemental report you want to link to an incident.
- Click the Actions icon (three dots in a circle) next to that report.
- Select Link to an Incident.
- In the modal, search for the incident by Report ID, Guest Name, or Incident Date.
- Select the incident you want to link to, then click Save.

Logging Out or Refreshing the Patroller Dashboard
For Form Entry users, such as those using patroller devices, the logout option is intentionally hidden from the user interface to prevent accidental logouts that could delay access for the next patroller on duty. For those using tablets, we also strongly suggest isolating the tablet in Kiosk mode, so that patrollers are unable to navigate away from the zPatrol system and on to other websites.
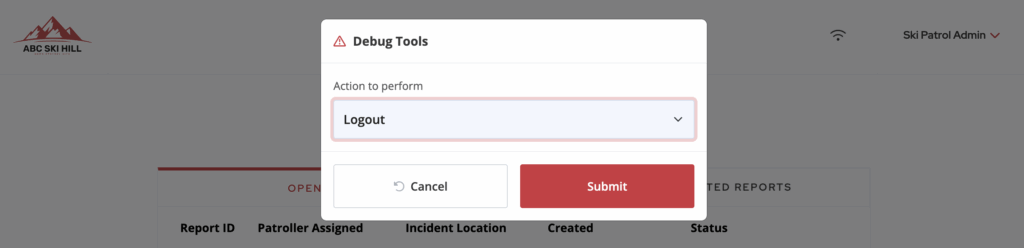
If a Form Entry user does need to log out of the patroller dashboard, they can click or tap the site logo in the upper left corner of the screen five times. After the fifth click, a modal will appear prompting the user to choose a page action. By default, it will suggest a page reload. The user should select Logout from the list of options and click Submit to complete the logout process.